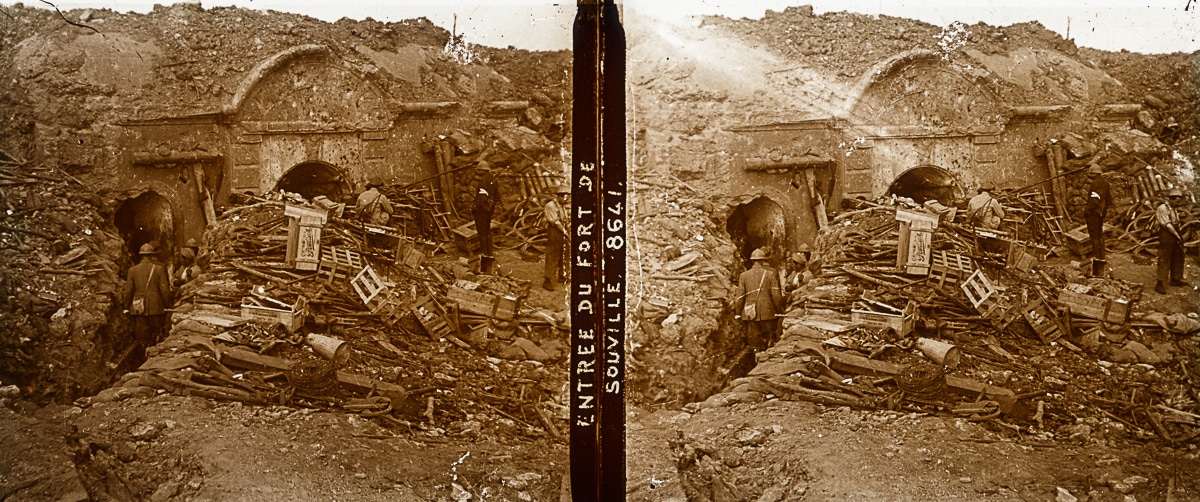
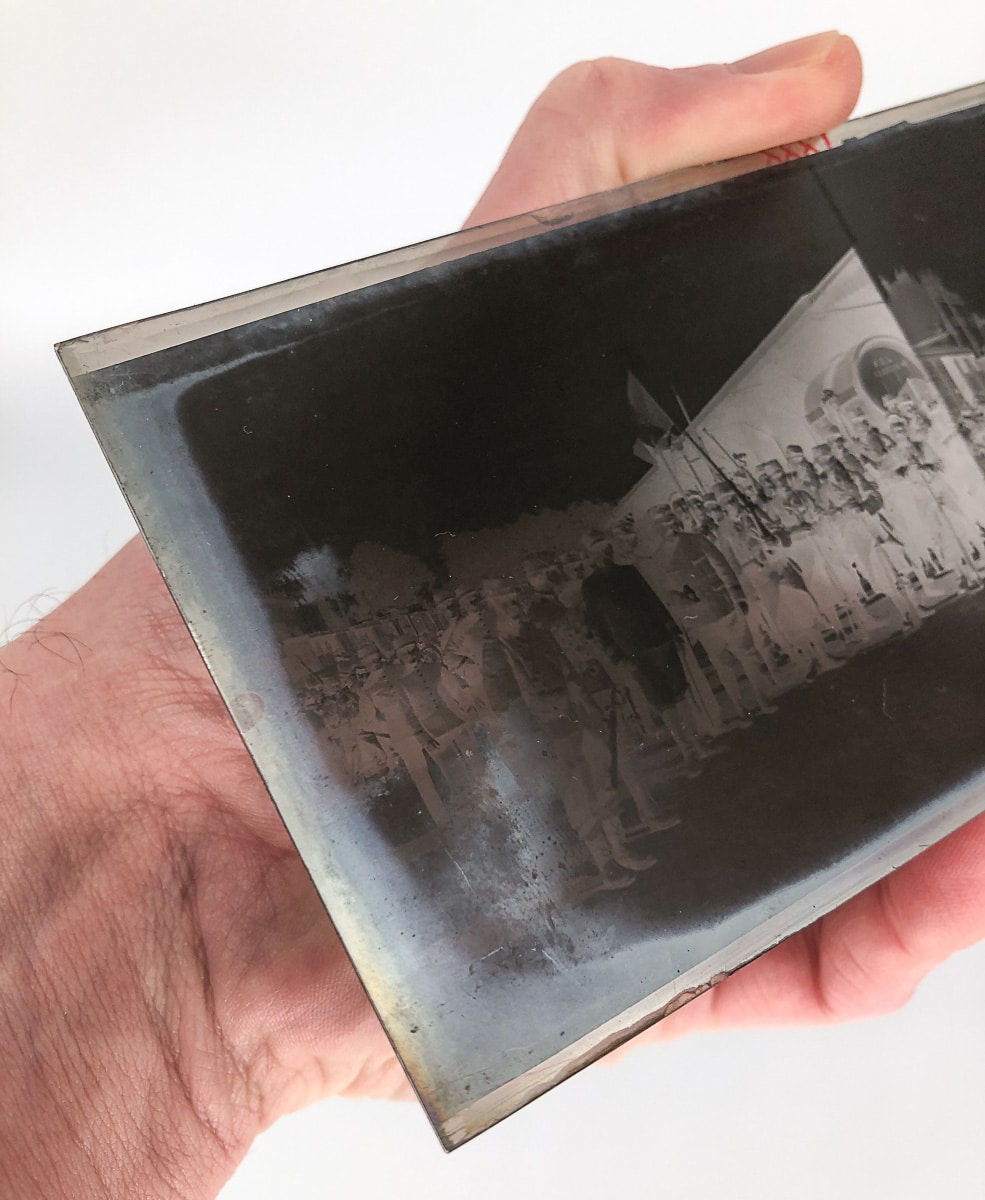
Glass was the main carrier for the negative emulsion until the 1920s. What many people don’t know is that glass was also used for printing positive images. This mainly concerned glass slides that could be viewed with a stereoscope or projected with a magic lantern. Scanning vintage glass plate negatives and positives comes with some challenges.
In this article an Epson V700 scanner is used to scan the glass plates. This high-quality flatbed scanner has an optical resolution of 4800 dpi for reflective media (photos, documents) and 6400 dpi for transmissive media (film, glass). The optical density is 4.0 Dmax. Epson now has a successor with the V800 (and V850), but the improvements are marginal and the V700 is still a very capable scanner. The best practices in this article apply to the Epson V700, V750, V800 and V850. To understand more about scanners and resolution, this excellent article on Imaging Resource is recommended.
The scanning software used is Ed Hamrick’s VueScan. The extensive options and clear user interface is a good alternative to the standard Epson software that comes with the scanner.
Scan preparations
Before start scanning, I recommend these precautions:
- Wear cotton gloves when handling the glass slides. They not only protect the sensitive emulsion of your slides, but also ensures that you do not leave fingerprints and scratches on the scanner’s glass plate.
- Remove dust particles from the slides with a blower, followed by a soft brush (only when needed).
- Place the slides in the scan holder with the emulsion side facing the scanner glass plate to get the best scan results (“emulsion down”).
The emulsion side has a matte surface. Sometimes it’s difficult to detect, but there’s a trick. The deterioration of vintage slides often causes the metallic silver of the emulsion migrating to the surface and oxidising to silver oxide. It produces a blue or purple glow. It’s especially visible in the darkest parts because that’s where the most silver is. It can help you to the detect the emulsion side.
Scan holders
In general, it’s not a good idea to place your glass slides directly on the scanner’s glass plate. You will not get the sharpest results and glass-on-glass can create Newton’s rings. You preferably place the slides in a scan holder, but this can be challenging with vintage glass slides.
A flatbed scanner usually comes with a number of scan holders for 35mm film and medium format film. The problem is that vintage glass slides can have exotic sizes, like the 45 x 107 mm and 6 x 13 cm stereoscopic slides. Creativity is needed to place the slides in the holder.
Luckily, the 6 x 13 cm slides fit exactly in the medium format film holder. To place the 45 x 107mm slides in this holder, a very thin plastic strip is used to make it fit. Again, a little creativity is needed.
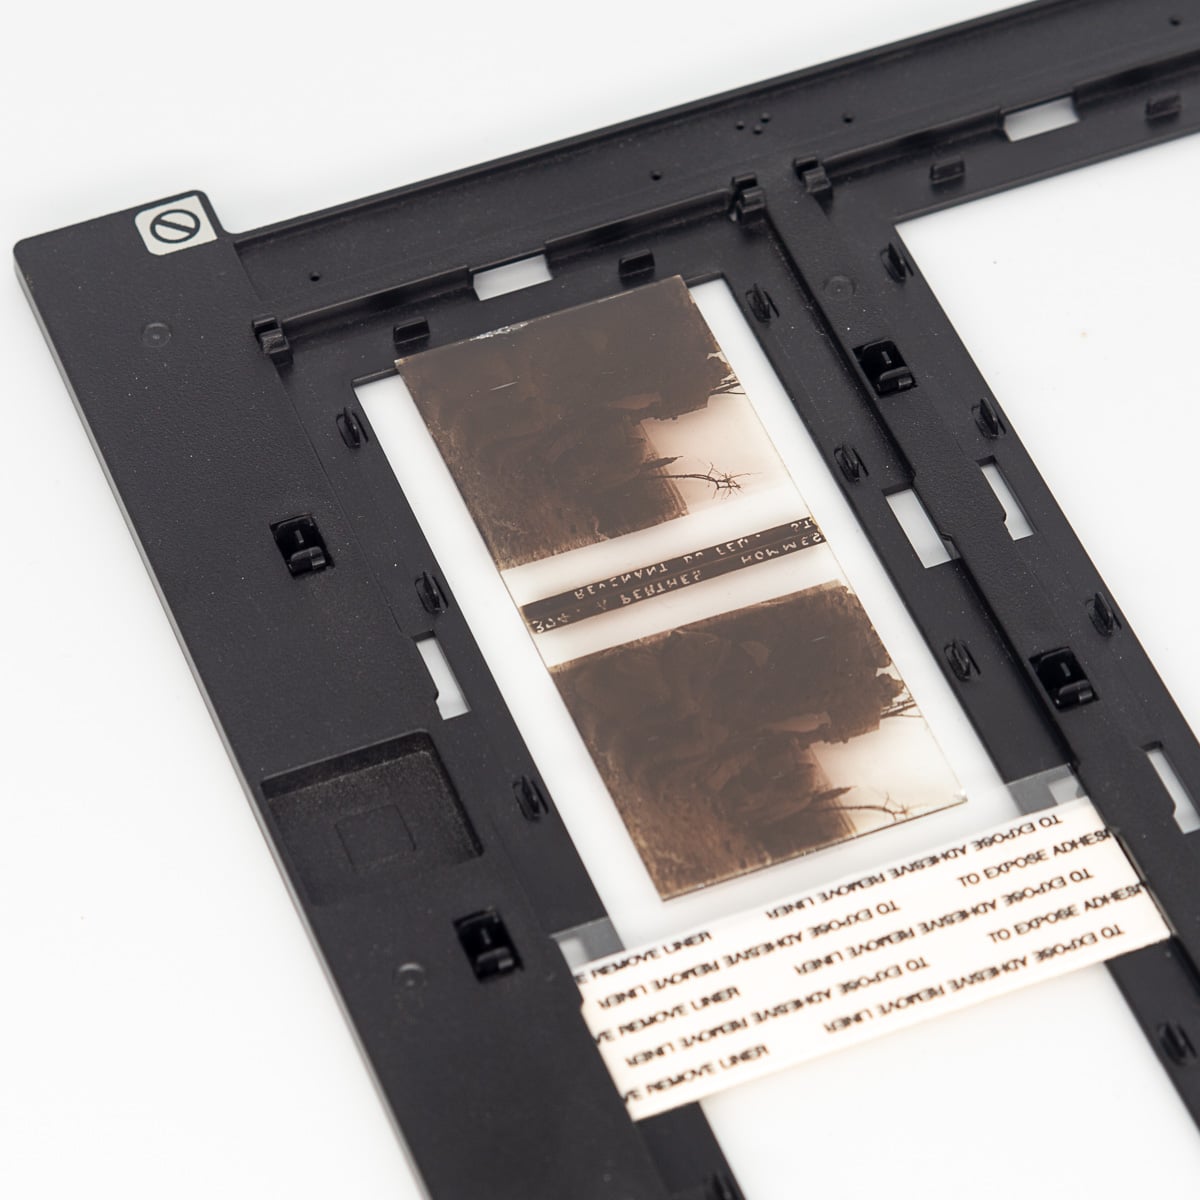
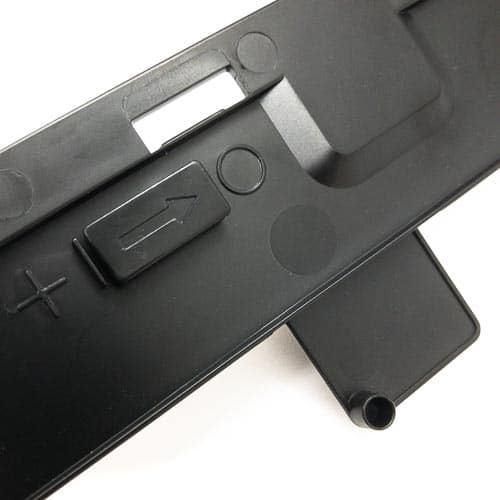
Holders height
The Epson V700 doesn’t support auto focus. You will have to adjust the height of the holder to achieve perfect focus and get sharp scans. The holder has height adjusters that can be placed in different positions to change the height of the holder. With no height adjusters installed, the gap between the holder and scanner plate is 2,5mm. When installed with the arrow facing the plus, the height is 3,5mm and with the arrow facing the circle (default value), the height is 3mm. You’ll have to find out what’s the best height for your scanner by doing some tests and compare the results.
Scanning without holders
If your glass slides don’t fit in any holder, there’s still a way to scan the glass slides by placing them on the scanner’s glass plate, but you should be aware of the limitations and the approach isn’t supported by each scanner. The Epson V700, V750, V800 and V850 scanners have a Dual Lens System with two lenses for scanning reflective media (with the High Resolution Lens) and transmissive media (with the Super Resolution Lens). The Super Resolution Lens captures the highest possible level of detail and sharpness and supports resolutions up to 6400 dpi. This lens requires the use of the scan holder.
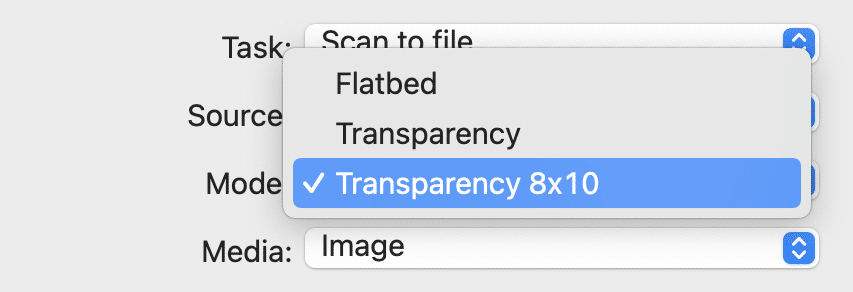
By choosing the setting Transparency 8 x 10 in VueScan, the lens for transmissive media is used and the glass slides can be placed on the scanner’s glass plate. This results in scans that are slightly less sharp compared to the Super Resolution Lens, and the scan resolution is limited to 4800 dpi. You also have to beware of Newton’s rings. Try what works best for you.
VueScan settings
After the preparations, and with the slide in the holder or on the scanner’s glass plate, you can switch to VueScan. Here’s an overview of the most important VueScan settings for glass plates. You’ll find comparable settings in other scanning software:
| B&W negative | B&W positive | Colour positive | |
|---|---|---|---|
| Mode | Transparency | Transparency | Transparency |
| Media | B/W negative | Slide film | Slide film |
| Bits per pixel | 16 bit Gray | 16 bit Gray | 48 bit RGB (16 bits per channel) |
| Output colour space | Gray | Gray | Adobe RGB |
What is the best resolution?
The right scan resolution depends on what you want to do with the scan. A photo that is scanned with a scan resolution of 300 dpi will result in a print that has a print resolution of 300 dpi when the printer prints the actual size of the original photo. This is the starting point, as 300 dpi is considered the base resolution for a good quality print. If you want to publish your scans on a website, a lower resolution is usually sufficient. A higher scan resolution is useful if you want to enlarge the original, but it doesn’t necessary improve the quality.
Things are different when scanning glass negatives. A negative is the source material to be developed. A high resolution is important to squeeze as much information as possible in order to create a good positive image through post processing. A resolution of 2400 to 4800 dpi is recommended here as starting point.
Some final remarks
- Make sure that if you have made a 48 bit scan (16 bits per RGB channel) that you save it as a 16 bit file (like 16 bit TIFF). If you choose 8 bit TIFF or JPG, you will lose the extra bits of scanned information because it doesn’t “fit” in these “smaller” file types.
- The vintage glass colour positives in this article are mainly black and white images with a color tone. In fact, a colour depth of 24 bit (8 bits per RGB channel) should be enough, especially if you don’t plan to do a lot of post processing on the scanned file. 48 bit is preferred when the extra file size is not a problem. It will not affect the scan speed.
- An output color space of sRGB would be suffice for the toned colour positives, but the wider Adobe RGB space is recommended. You can always convert to a more narrow colour space later.
- Don’t apply all kind of filter settings like sharpening, contrast enhancements or restoring fading during scanning. Post processing with Adobe PhotoShop or Lightroom gives better control over these adjustments.